Thursday, November 11, 2010

Finally back in the shop

Well, let's just say that the move didn't go so well.  Less than a week after moving into my new house, Darren and I were starting to insulate and hang drywall in the workshop.  After a crash, xrays and a doctor setting the break, I spent the next 6 weeks in a cast for a broken wrist and the month after that getting mobility and strength back.  But, the shop is now finished and we got back at the plane this past weekend.  We've decided to do the last few things on the empennage and wings so that we can have the inspector come.  So, you won't see any major new parts for a little while because once the inspection is finished we're going to close up all the horizonal stabilizer, vertical stabilizer, elevators, rudder, fuel tanks, ailerons, and flaps.  All the parts are ready for the final work and it will be nice to have parts completed. 


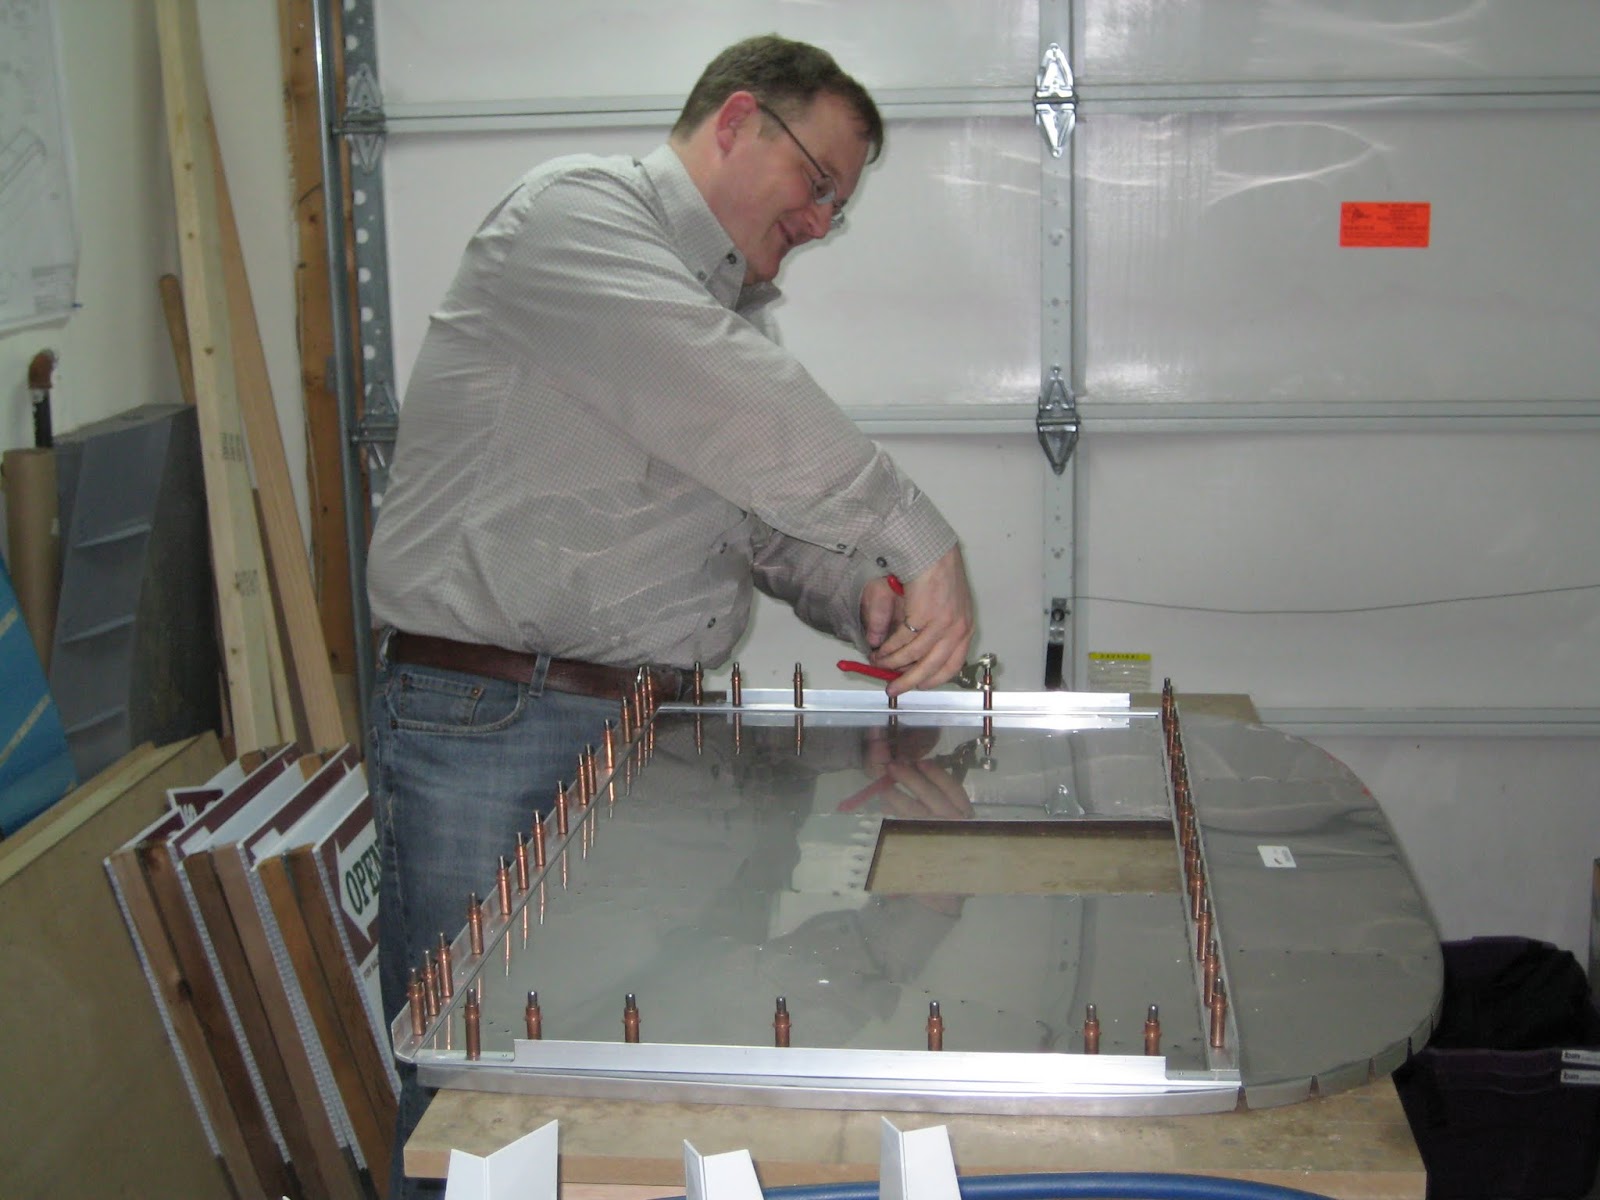
Scott working on one of the fuel tanks.


The fuel tank.


Scott gearing up for some priming, or possibly mixing up some tank sealant.


The bracket primed and riveted in place.


Another of the bracket.


Our new bucking bar

Monday, July 26, 2010

EAA AirVenture

We ended up in Oshkosh Wisconsin this summer for EAA Air Venture.
One of the goals of the trip was to get some paint ideas for the plane.
I might through some other picture from the trip up later, but for now here are some fo the paint schemes we liked.


Saturday, May 22, 2010

Bulkheads are finished

Today we wrapped up the last few bulkheads for the fuselage.  We started off by finishing up the match drilling we started on Thursday night.  There wasn't a lot of manufacturing to do today, we finished most of those tasks on Thursday.   After that we began the long process of edge sanding, deburring and sanding all of the parts.  After we cleaned a primed all the parts, we assembled the remaining bulkheads.  We were finishing up the last few rivets when the power failed.  The good thing about air tools is that the tank gives you a certain amount of buffer.  Anyways, the power was out for about 30-40 minutes so we started packing up the workshop.  When the power came back we finished up the last few rivets and wrapped up our packing tasks.  The workshop is mostly ready to be moved.


Thursday, May 20, 2010

More bulkheads

Tonight we got back to work on the last few bulkheads.  Darren and I spent time manufacturing some attachment angles and parts.  We wrapped that up and started match drilling all of the components together.  The last few bulkheads are quite straightforward so the work is moving along briskly.  We'll wrap those up on Saturday and then start packing up the workshop for the move to my new house.  There will be one more update on Saturday and after that we'll have a few weeks off while things get setup in the new house.

Friday, May 7, 2010

F-706 Bulkhead Complete

Today we finished up the F-706 bulkhead.  This is the first bulkhead in a series of a few that form the "tail cone" at the back of the plane.  This one also has the bellcrank that will connect the control sticks to the elevators.
We started out by manufacturing more pieces of aluminum angle and match drilling those to the ribs.  After that we went through the normal sequence of assembly, match drilling, deburring, prepping and priming for all the parts.  Finally we assembled the bulkhead.


F-706 part way through the construction.


F-706 after the assembly is completed.


Different angle of the F-706 after the assembly is completed.

Wednesday, May 5, 2010

Finished F-705 Bulkhead

Tonight we worked on assembling the F-705 bulkhead.  This one had a lot of parts but our pneumatic squeezer made short work of all the rivets.

Scott working on the assembly.

Saturday, May 1, 2010

F-705 Bulkhead Progress

Today we finished all the manufacturing, match drilling and prep (deburring, sanding and priming) work for one of the centre bulkheads (this is the one where the seatbelts and the rear wing spars attach to).  We manufactured a lot of the parts for this bulkhead from un-prepped aluminium parts so it took a tremendous amount of time.  In any case, we made good progress and will be ready for assembly one night this week.


Scott working the drill.


Scott checking his work.

Tuesday, April 27, 2010

Started on F-705 bulkhead

Tonight we started work on the F-704 bulkhead.  This is the other key part of the fuselage where the rear wing spars attach the the fuselage.  More importantly it is where our seat backs will rest and where the seat belts get connected.  We started off by locating all of the main parts (they were split between Darren's and my house).  After that we began manufacturing a bunch of the parts that are needed for this bulkhead.  We ended the night by having all the parts retrieved and most of the parts manufactured.  Assembly will start on the weekend. 

Some of the F-704 pieces layed out.


More of the F-704 pieces layed out. 

Sunday, April 25, 2010

The heart of the fuselage

Today we wrapped up most of the tasks associated with the bulkhead where the wings attach to the fuselage.  The bulkhead is built in two halves.  Van's Aircraft calls this "the heart of the fuselage".  We finished up the deburring tasks and started riveting the parts together.  Again, the pneumatic squeezer saved us a lot of time and energy. 

After that we worked on the parts that attach the control column to the bulkhead.


The other half of the fuselage has a number of places to connect panels, etc.  These all have three snap bushings drilled.  Here's a picture of us fitting the parts to the spar.


And here's another couple of them with the parts attached.


Monday, April 19, 2010

Finished firewall and started on main bulkhead

Tonight we finished up the last few rivets on the firewall and riveted on the doubler plate.  After that we started work on the bulkhead where the wings bolt to the fuselage.  Needless to say this is the heart of the fuselage.  We started off by drilling some holes for bushings (essentially little pieces of plastic that protect wires or cables from rubbing on the metal and chaffing).  After that we assembled the forward and aft portions of the bulkhead using the close tollerence bolts (and are they ever close tollerence) and clecos.  We match drill something called "shear bars" to the aft portion of the bulkhead and then finished up match drilling all of the parts.  Things went smoothly so we made a lot of good progress.

Scott working on the drill press.

Saturday, April 17, 2010

Firewall assembly

Today we worked on the firewall.  The first step was to disassemble the entire thing so that we could machine countersink all of the stiffners and prep all of the parts.  I'll assume from now on that I don't have to talk about deburring (which took a lot of time).  After the prep work we prepped and primed all of the parts (except the firewall itself which is stainless steel).  We started assembling the firewall and managed to get most of it completed.  Only the fuel pump doubler plate and a few rivets on the attach bracket remain.


Darren machine countersinking the stiffners


Scott dimpling the firewall


Darren making sure that the bolts can fit in the platenut


Scott back-riveting the stiffners to the firewall


The (mostly) assembled firewall

Monday, April 12, 2010

Firewall continued

Tonight we spent a few hours wrapping up some of the pre-assembly tasks on the firewall.  First we match drilled some of the spacers and the two big attach brackets.  Next we finished match drilling the firewall recess.  Finally we drilled and match drilled the doubler plate for the fuel pump.  The firewall is now ready for disassebly followed by prepping (deburring, countersinking and sanding) and priming of the non-stainless steel parts.


Scott drilling the fuel pump doubler plate


 A picture of where we were at the end of the day

Saturday, April 10, 2010

Start of fuselage (firewall)

Today was a mix of activities.  While I searched out the parts for the firewall and manufactured a few parts.  Darren finished machine countersinking the trailing edges for the ailerons and flaps.  Once that was done we started on the first piece of the fuselage kit -- the firewall.  It was necessary to manufacture a few attach angles, stiffners and reinforcement plates but now that we've done this before it was old hat.  Afterwards we started clecoing the parts to the firewall and match-drilled the main components.  


The parts for the firewall layed out


Scott clecoing the parts to the firewall

Friday, March 26, 2010

Lefty and Righty are ready for inspection

Darren and I took a day off work to wrap up work on the ailerons -- lefty and righty.  Because they're relatively straight-forward we built both ailerons together.  We started off by wrapping up dimpling the main skins.  Next we began assembly by attaching stiffner plates and plate nuts to the main spars.  After that we riveted the nose ribs to the counter-balance (a relatively heavy piece of stainless steel tube).  The final bit of skeleton assembly was to rivet the nose rib assemblies and the main ribs to the spar.  
After that we clecoed on the main and leading edge skins and began the process of riveting.  The remaining rivets will be set after the inspection.

Darren clecoing the nose ribs to the counter-balance tubes.


A picture of the aileron plans


Darren happily blind-riveting the nose rib to the counter balance


Lefty in the "Saddle" for riveting


Lefty and Righty on the bench after riveting (note that the shop was also vacuumed)

Wednesday, March 24, 2010

Left and Right Aileron - Prep and Prime

Tonight we wrapped up the prep work on the ailerons.  We continued deburring any remaining holes and cleaned up the edges of all the aluminum sheets.  While that was being done the main spars were machine countersunk.  After that we finished dimpling the sheets before prepping and priming all of the parts.  The ailerons are now ready for assembly.