Saturday, November 14, 2009

Ailerons and more fuel tank work

Today we worked on a couple of things.  First, we worked on sealing and riveting the fuel tank today.  Next, we started working on the ailerons.  For the tank, it was deja vu.  We sealed and riveted another couple of ribs.  We've decided to time limit the tank sealing sessions because the smell is horrible.  A few hours is enough with that smell. After that, we started working on the ailerons and it was nice to work on something completely new.  The ailerons are a little different because they have a stainless steel tube that is used as a counter-balance.  We match drilled the reinforcement plates to the aileron spars and then worked on drilling the counter-balance tubes to the ribs.  After that, we cut all of the stiffners and prepped them.  Our final step was to match drill the stiffners to the aileron skins.

The tank after a little more progress.


A shot of the tank from the "inside" view.


 Time to change it up for a bit, a fresh start for the ailerons.


A shot of the ailerons with a few pieces cleco'd together.


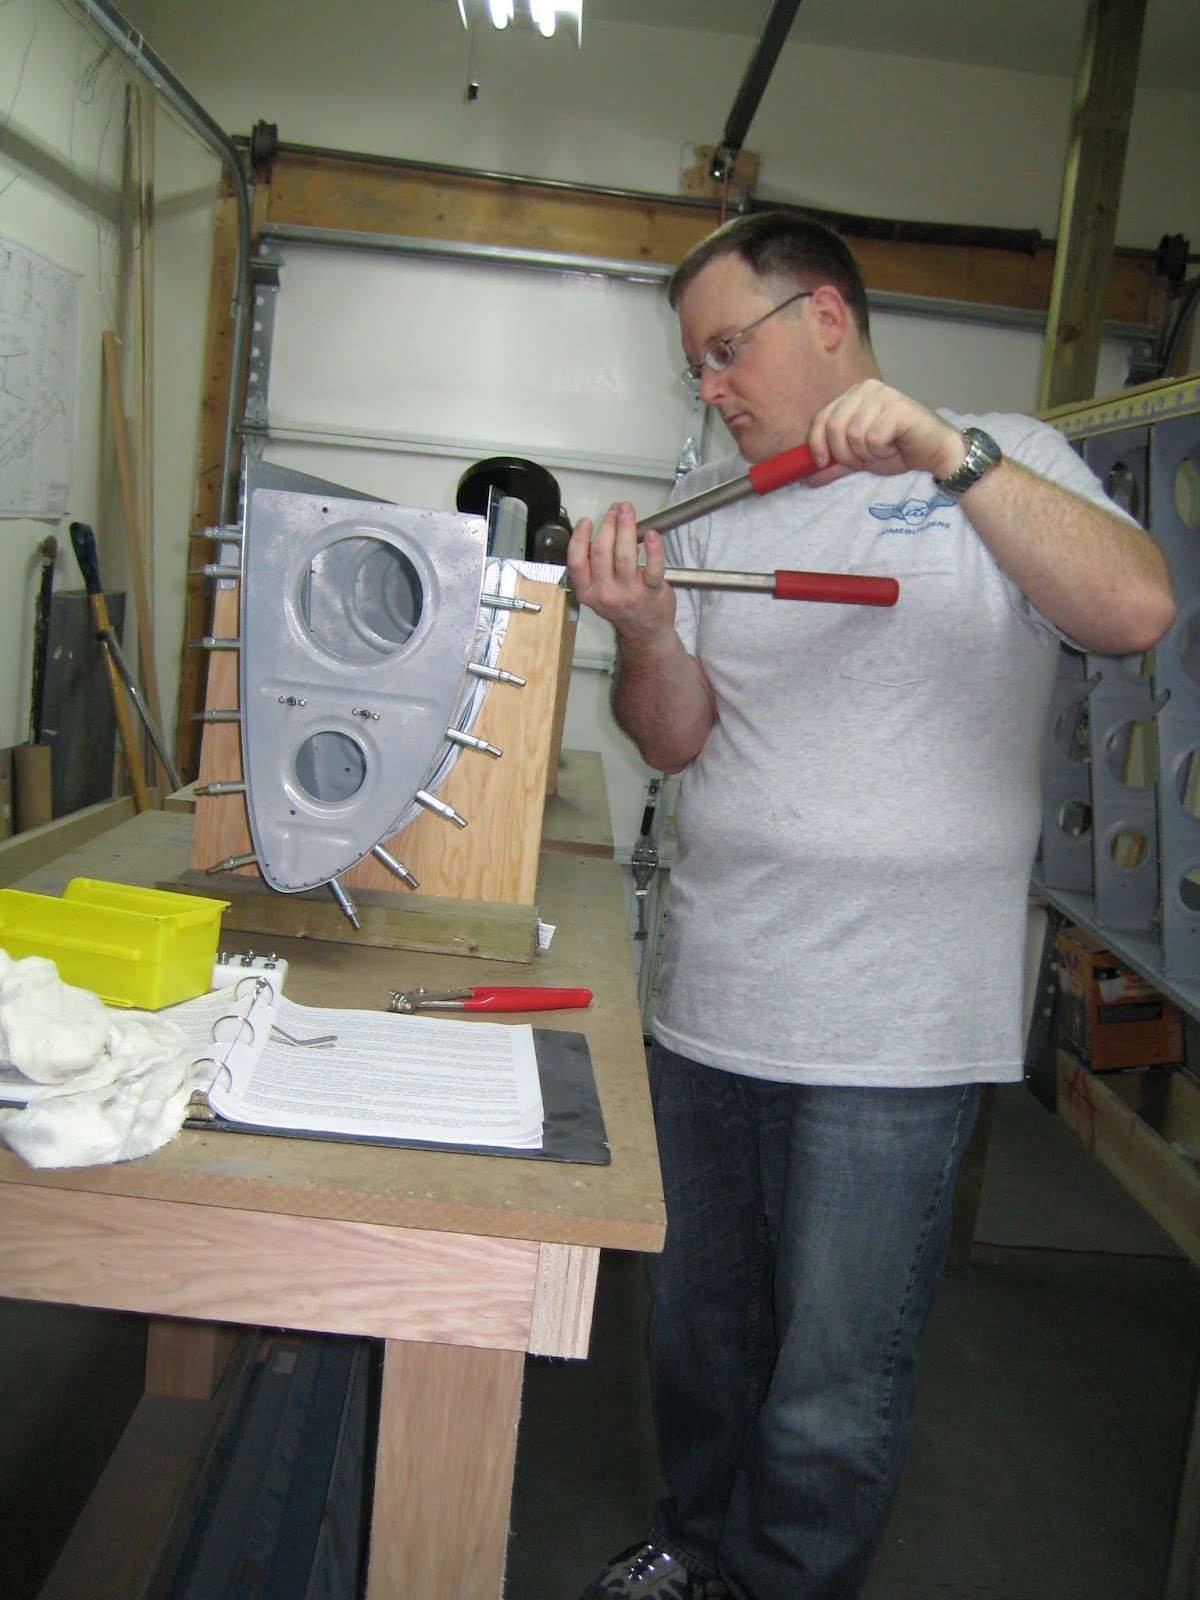
Scott working on cleaning up a few pieces for the ailerons.

Wednesday, November 11, 2009

Riveting the tanks

Today we worked on riveting the fuel tanks.  Because the tanks need to be leak proof each hole needed to be cleaned, some pro-seal (aka midnight-grey death) added, the rivet inserted, the rivet set and then the inner and outer skin cleaned.  We got about half way done with one tank today.

A picture of one of the tanks after the day's efforts

Saturday, November 7, 2009

Rolling, rolling, rolling down the side street

Today we finished up much of the right wing.  We riveted the gap fairings to the top skin and rear spar.  Finally we prepped (deburred, dimpled and primed) all of the bottom skins.  Once that was finished we used the wing stand to take the wings to Darren's house (hence the title).  Unlike the last time we rolled a wing to Darren's we got a few confused looks this time.  As usual with Ontario, no one would actually think to ask what we were doing -- if this was Saskatchewan (where people are friendly) I figure the move could've taken an hour as people stopped to talk.
Before we started work today we moved some of the bigger pieces of the fuselage kit over to Darren's house and cut up some of the wood left over from Home Depot aircraft supply (the fuselage crate lid, the wing stand, etc) to clean up the shop.  We even vacuumed. 
To put the icing on the cake that was today, Saskatchewan beat Calgary to win 1st place in the West!  For the first time in 33 years Regina will be the host of the Western final.  Go Riders!  I wish I could make it home to see that game.


A picture of the wing wing prior to transport.
 

Scott working on prepping one of the bottom wing skins.


Scott finishing up clecoing the bottom wing skin prior to wandering down the street. 

Friday, October 30, 2009

The fuselage is here

We spent a non-spooky haloween day inspecting, inventorying and organizing the fuselage kit.  Once again Van's did a great job packing the kit and we were only missing 2 parts (and we only had 1 extra).  Considering how many parts are in this kit I'm quite impressed.  We're setting the fuselage aside until the wings are done and we have the empennage and wings inspected.


The crate just after it was delivered.


The crate shortly after we opened it up


Scott doing paperwork while Darren unpacks


Darren unwrapping parts and folding up packing paper


Almost finished unpacking.  The roll you see are the main fuselage skins.

Saturday, October 17, 2009

Fuel tank sealing and other right wing work

Sorry for the delayed updates.  At the end of September we worked on sealing both the left and right fuel tanks.  We sealed all of the tank ribs (except the end rib) and clecoed all of the ribs to the skin.  We're actually quite happy with the results but the sealant is smelly and sticks to anything (see the other post).
 
We took a few weeks off because of travel and other events.
 
When we got back to it, we returned to the right wing and attached the aileron and flap brackets.  Finally we did all the prep work (match drilling, deburring, dimpling and priming) for the airleron and flap gap fairings.

Saturday, September 19, 2009

Midnight Grey Death (sealing the tanks)

Normally when people refer to the fuel tank sealant there are a number of words to describe it -- Proseal (a brand name), Black Death (it is sort of black) or other names that have four letter words in the title.  When we were working Darren interjected a little levity and said that it really wasn't black it was more like a Midnight Grey.  Henceforth we'll refer to it as "Midnight Grey Death".  This has to be the worst thing we've had to work on so far.  The prep work is very demanding as the instructions require you to score the mating surfaces really well and then clean it so that there are no contaminants.  However, you can't touch the aluminum without gloves because your skin oils will weaken the sealant.  So, we got to spend the day wearing blue gloves.  But, it gets worse, the tank sealant -- midnight grey death -- is sticky and it gets everywhere.  Oh yeah, it really likes to stick to the blue gloves.  Supposedly sealing is like icing a cake but imagine if cake icing would stick to everything and couldn't really be cleaned off except with some awful chemical and major scrubbing.
Anyways, I've complained enough.  For all of that we actually made good progress on both fuel tanks.  We installed and riveted the fuel tank stiffners in both tanks.  On the left tank we also installed the fuel tank filler flange, the tank drain flange and sealed the rivet heads.  We're well positioned to get the tanks together this week.  This is one of those jobs that was rotten to do but the memory will fade...eventually.
Oh yeah, we also did some work on Thursday night last week.  We riveted the inboard and outboard flap brackets, installed the centre bracket, and matchdrilled all of the reinforcing angles.  Also we assembled the aileron attach brackets.


Saturday, September 12, 2009

Bucking Rivets

Yes, that was always meant to be a "B".  Sorry for the lack of updates over the last few weeks but the work hasn't been exciting enough to write about in detail.  However, the work may not have been unique or exciting but the results are great!  We're finished riveting the leading edge on the main spar (done last weekend) and riveted on all of the top skins and "J" channels.  I'm not interested in counting the number of rivets we've installed over the last couple of weeks but suffice it to say that it was alot.  Once we finished riveting the wing skins,  we got to work on the aileron and flap attach brackets (we'll post pictures of this but if you can't wait you can take a look at the left wing pictures). The aileron brackets are fairly straight-forward (that is until you need to figure out what needs a countersink and what doesn't) but the flap brackets have some reinforcing angles that need to be cut.  All of these parts are cut and ready to be match drilled, prepped and primed during the next work session.


Sunday, August 30, 2009

Leading Edge Assembly

Today we started by cleaning up the workshop.  We wiped down the wing skeleton and vacuumed the workshop.  After all of the match driling and deburring there was a lot to be cleaned up.  Next we riveted the leading edge together.  There are a lot of rivets and we had to work to get the skin to line up tightly.  We finished up the riveting and installed it on the main spar.  Finally we painted the overlap on the skin. 


Wednesday, August 26, 2009

Right Wing prep work is finished

Tonight we finished up the last of the preparations.  We reassembled the leading edge and installed the platenuts for the leading edge.  Finally we prepped and primed the spar countersinks and the remaining parts.  Next time we'll work on assembling the leading edge.

It was time install some pieces for the landing lights in the leading edge.... This pattern is ment to ensure the proper placement of platenuts.


The main spare after the machine counter sinced holes have been primed. 

Saturday, August 22, 2009

This much fun should be illiegal


Well, today was another day of prep work.  We put in a lot of hours and now we're almost finished all of the prep work on the right wing. To speed things up we split up to cover more territory but I won't try to allocate the tasks to a specific person.  We worked on deburring and dimpling all of the remaining rivet holes on the wing skeleton and skins, In addition we installed the plate nuts on the right fuel tank "Z" brackets (the fuel tanks have been set aside until the new caps arrive.)  We also machine countersunk the main spar rivet holes.  Plus, we disassembled, deburred and dimpled the leading edge ribs and skin.  Next we drilled the plate nuts to "W-919" which is the place where the fuel tank gets attached to the leading edge.  Finally we prepped and primed the leading edge ribs and skins.  Of course, all of the skins still had the blue plastic protective coat on so that was cut off before any deburring or dimpling was done.  All in all, it was a great day of work but it looks like we've taken a giant step backwards now that we have a bare wing skeleton sitting in the stand.  Next time we'll start riveting the right wing leading edge together so the wing starts to look like a wing again. 

Scott working on one of the leading edge ribs.


Darren machine countersyncing some holes on the main spar.


Darren drilling out some holes for the platenute attachments on the the wing tank re enforcement plate.


Scott priming some of the pieces... it gets a little cloudy in there. 

Thursday, August 20, 2009

More fun than a barrel of monkeys

Not!  We spent all of today doing prep work.  First we match drilled the fuel drain flange to the left fuel tank skin and that was the end of the fun tasks.  Next we disassembled the left fuel tank and proceeded to deburr and dimple all of the parts.  Once that was done we set the left fuel tank aside.  We are waiting for the delivery of the nice, shiny, stainless steel fuel caps.
We then moved onto the right wing skeleton.  We removed the top skin and starting working on deburring and dimpling all of the parts.  Luckily with two of us we can employ a divide and conquer strategy.  Darren worked on removing the blue plastic protective coating from the main skin.  He then deburred both sides of the sheet and beveled the skin overlap.  While he was doing that, I worked on deburring and dimpling all of the holes in the wing skeleton.  Afterwards, we teamed back up to dimple the main sheet.  Lastly we prepped and primed a few of the fuel tank parts and the main wing skin.

Scott either taking some clecos out, or putting some clecos in (the process is repeated alot...).

 
Darren doing some pre-paint prep work. 

Sunday, August 16, 2009

Fuel tank progress

Today we did work on both fuel tanks and finished up the preparation work on the right tank.  The first task was to use the flycutter on the drill-press to cut out a hole in the inboard tank rib for the access cover (both left and right tanks).  Next we match drilled the access covers to the end-ribs and then match drilled the stiffner rings to the ribs.  Because the access panel is secured using screws, we had to install platenuts (which means 2 rivet holes in addition to the screw hole).  Before the platenuts could be installed, the rib needed to be deburred and dimpled and the stiffner ring was countersunk.  We next drilled the holes for the fuel pickup tube, fuel vent line and the capacitive sensor connector.  Once that was done, we then installed the stiffner and platenuts to the rib (this was done on the left and right fuel tanks.)  Next we match drilled the fuel tank drain flange to the right tank skin.  Finally we concentrated on the right fuel tank.  We disassembled, deburred and dimpled all of the ribs and skins.  We are waiting for the new fuel caps to arrive before we start to seal the right tank.  Next session we will wrap up the prep work on the left tank in the hopes that the tank caps arrive before we're ready to start sealing the tanks.  


Since we are using a capacitive fuel sensor we had use a different acess cover for the tank.  We used the access cover included with the base kit to place the hole used for the fuel pickup tube.


The end rib, re-enforcement plate, and access cover prior to some prep and assembly work. 


Darren cleaning up a re-enforcement plate. 


 An end rib with the plate-nuts, and re-enforcement plate riveted into place.


 The access cover sitting in place.


A close-up of the skin after some dimpling work. 


 The skin more or less ready for assembly.


Another  close-up of the skin after some dimpling work.  

Monday, August 10, 2009

Tank stiffners and "Z" brackets

This update is being posted a little late.  We spent the evening working on the stiffner plates which attach to the two end ribs, preparing the capacitive fuel sensing plates (these measure how much fuel is in the tank), and the "Z" brackets which connect the fuel tank to the main wing spar.  Darren and I split the tasks for the evening -- I worked on the stiffner plates and capacitive fuel sensor plates and Darren worked on the "Z" brackets. 
The stiffner plate were made by cutting the proper shape on the bandsaw and then I used the grinder to fine-tune the fit to the tank skin.  After that I match drilled the stiffners to the ribs.
Next I match drilled the capacitive fuel sensor plates to the proper ribs and did the work necessary to install the platenuts on the sensor plates.
While that was going on Darren took care of a lot of things with the "Z" brackets.  He first match drilled platenuts to the brackets for the screws that will connect the fuel tank to the main skin.  Next he countersunk all of the rivet holes for the plate nuts and started the preparation for priming.
Scott match drilling a tank rib stiffner. 

Saturday, August 8, 2009

Right Fuel Tank Progress

Today we continued working on the right fuel tank.  First we finished match drilling the "Z" attach brackets.  Next we installed the rear baffle and temporarily attached the "Z" attach brackets.  Once that was done we installed the fuel tank on the wing and match drilled the "Z" brackets to the main spar.  After that we checked the wing for twist.  The plans allow for a 3/32" difference.  Well, after careful measuring and confirmation we determined that our difference was 0/32".  Not too shabby!  Next we took a divide and conquer approach, Darren match drilled the fuel tank ribs and skins while I manufactured (cut out of aluminium angle, drilled and polished the edges) an attach bracket.  Finally we countersunk the tank skin where the rear baffle gets attached.  We called it a day at that point. 

The wing with the fuel tank cleco'd into place. 


A close-up of the tank. 


 Darren match drilling the tank skin / rear baffle.


Scott taking a turn at match drilling.