Saturday, January 31, 2009

Left Wing Assembly (Jan 24, 27, 31)

This update covers the last 3 building sessions.  We've moved back to the left wing and started final assembly.
The first thing we did was to drill holes in all the ribs for wiring conduit.  This isn't strictly necessary as we could've used gromets to secure the wires or standoffs through the lightening holes but the conduit will make it easier for us to run the wires in the wing.  We will need to run wires for the landing lights, position lights, antennas, and ,possibly, autopilot servos.
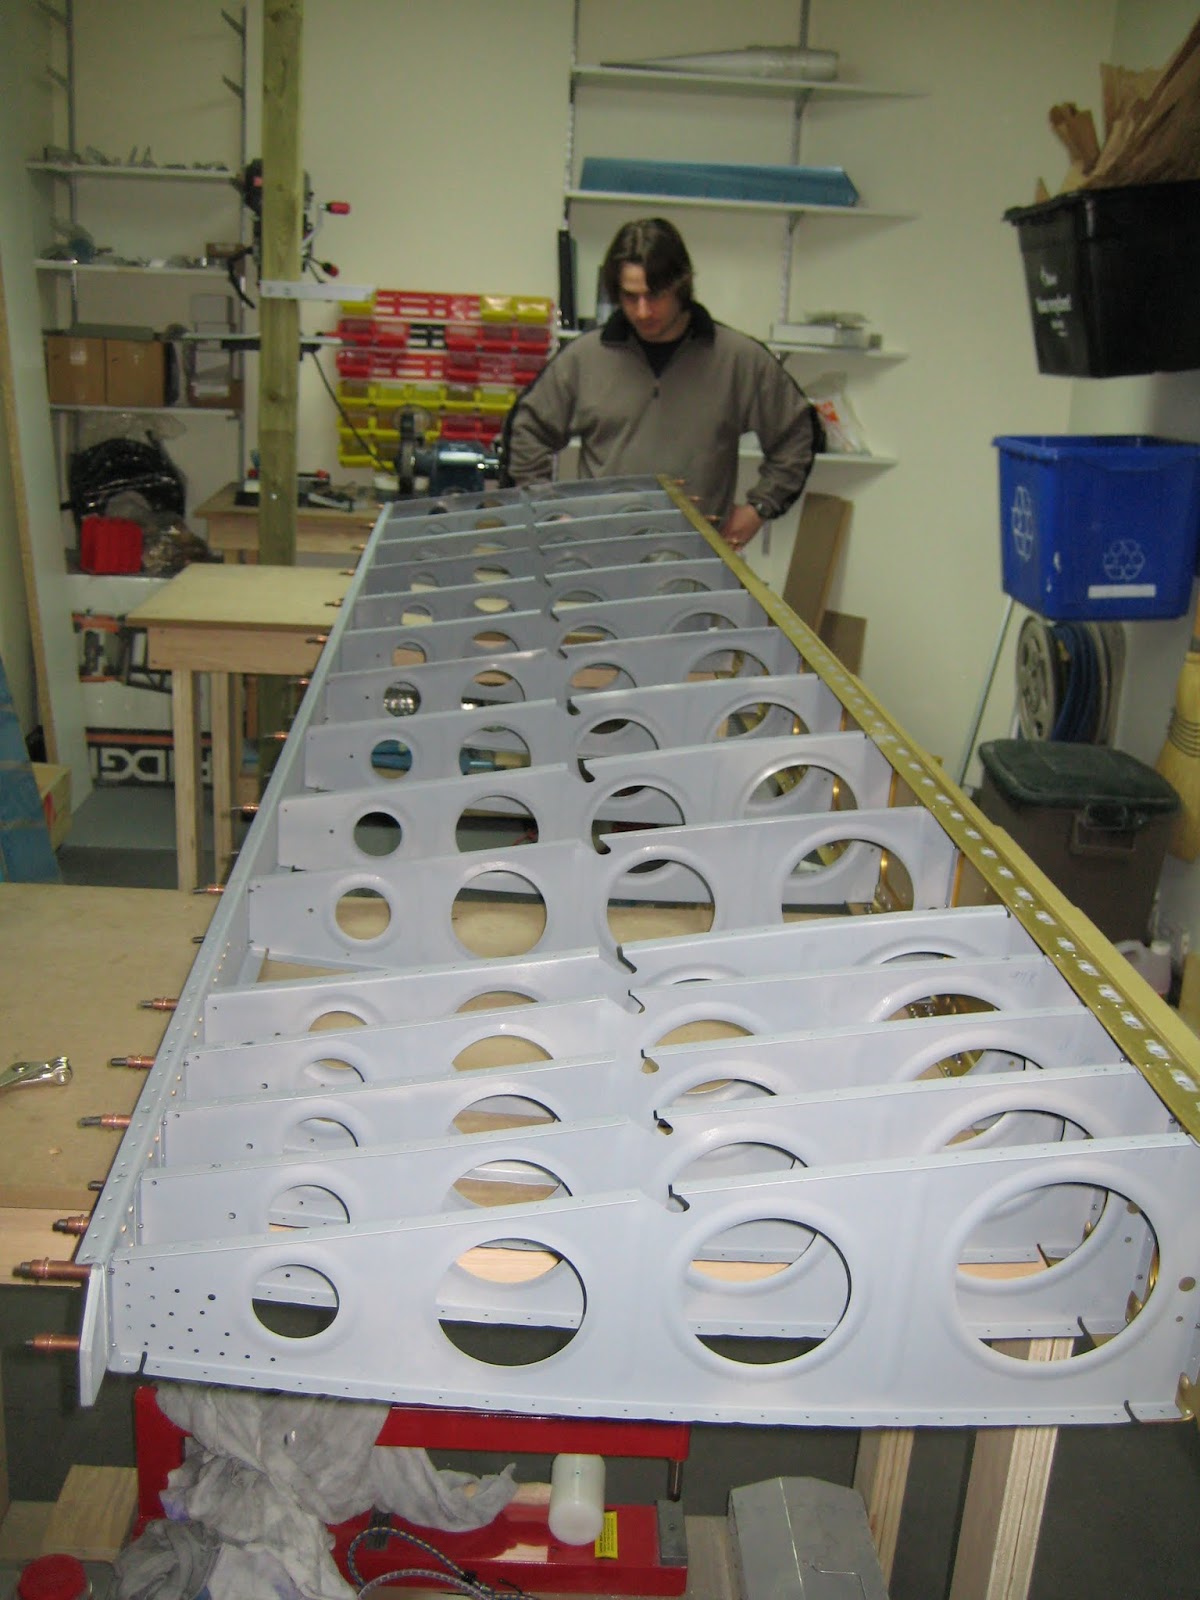
One the holes for the conduit were done we started assembling the ribs, main spar and rear spar.  We couldn't use our pneumatic squeezer on the main spar so we broke out the rivet gun and bucking bar.  It doesn't look like a lot of work but those rivets took a long time.  Finally, we riveted the ribs to the rear spar.  Our next step will be to fit the top skins onto the wing.  But, before we do that, we'll need to get the parts from Darren's living room!


A picture of the hole made for our conduit run.


Another picture of the hole made for our conduit run. 


Scott riveting one of the ribs to main spar.


Darren riveting one of the ribs to main spar.


Another picture Darren riveting one of the ribs to main spar. 


All the riveting on the main spar is done.


Scott riveting the ribs to the rear spar.

Saturday, January 17, 2009

Right Wing rear spar

Today was another day of mirrored deja vu.  We worked on the right wing rear spar which was identical (but in reverse) of the work we did on the left wing.  We deburred the edges of all the parts and then match drilled all of the plates and, where necessary, we countersunk for some of the rivets.  Darren cut the hole for the aileron push tube while I did some deburring and other tasks.  We then prepped and primed all parts and assembled the rear spar (we riveted the plates and doublers).  We set aside the right wing parts and our final task was to clean up the workshop (vacuum, dust, etc) and then we returned to the assembly of the left wing.

Rear spar layed out, and ready for  assembly.


One of the doublers.


 Doubler with the aileron push tube hole cut out.


Another shot of the same doubler from another angle.


Darren fine tuning the hole for the airelon push tube in the doubler.


 Another shot of Darren fine tuning the hole for the airelon push tube in the doubler.


 Time to use the pneumatic rivet squeezer.


All the doublers riveted to the rear spar.


Everything we have ready cleco'd together.

Saturday, January 10, 2009

Finished Right Wing Main Spar and started on the tie down bracket

Today we wrapped up a bunch of tasks on the main spar.  We did all the work necessary to attach the access panel plate nuts (match drilled the holes, countersunk for the rivets, spot primed all of the countersinks, riveted the plate nuts to the spar, countersunk the screw holes, and primed the countersinks).  Next we attached even more plate nuts to the main spar -- I thought that we were getting close to being done with plate nuts but there are at least another 200 in the hardware bags so it seems like we're not even close.
Finally we had a little change of pace when we worked on the tie down bracket.  We trimmed the bracket to size (the band saw I bought works great) and match drilled it to the spar.  We then did the work to connect and match drill some parts to the tie down bracket.  I bet you can't guess what the parts were -- plate nuts, yippee!  We then countersunk for the rivets and prepped and primed the tie down bracket.  After than we called it quits for the day as the parts needed to dry a little and the workshop was filled with paint fumes -- yuck.  We'll wrap up the tie down bracket quickly and move onto the rear spar during our next session.  

Scott re-reading the instructions for today's activities.

 Scott match drilling a few holes in the main spar.


Darren match drilling a few holes in the main spar.


A lesson in why I should put the pictures up the same day they are taken... I am not really sure what I am up to....


 Closeup of Scott working on the tie-down bracket.


 Darren getting the rivet gun ready for some action.

Tuesday, January 6, 2009

Continued work on the right wing main spar

Tonight we continued working on the fuel tank attach plate nuts.  We riveted the plate nuts to the main spar and then countersunk the screw holes.  The final task of the night was to prep and prime all of the countersunk screw holes.  Priming isn't a pleasant task but the masks we have work great and don't let any of the fumes through.

Saturday, January 3, 2009

We're back in the workshop again

Well, it's a new year and we're back at construction on the airplane. We've wrapped up the hangar for the season (the electrical was installed on the weekend before Christmas) so we can finally get back to working on the airplane.  If we even think about building a hangar again I hope someone will give us a shake.  It wasn't like doing a building in Saskatchewan -- it probably would've been finished in a couple of weekends -- but we were lucky to have a few friends who gave up a bunch of their weekends to help us out.  At the end of the day the hangar looks pretty good but now we need to get back to building the airplane so we can fill it up!
We finished the reworking on the right wing main spar and did all the tasks necessary to attach the plate nuts for the fuel tanks.  It's the exact same job we did on the left wing (except a mirror image).  Even though we had a few months off the skills were still there and we were able to move through the task a lot faster than on the left wing.  
We took a couple of pictures this time (they'll be uploaded later) but you can look at the left wing pictures in a mirror and they'll be the same as the ones we'll post.  At least we hope that the wings will be symmetrical. :-)

Yes a lot of time has passed so much in fact that flipping a couple of pages on the calander wasn't even enough... We needed a whole new calander


Darren working on clecoing the plate nuts to the main spar.